Security & Access Control
Secure your RepairOps organization with multi-factor authentication, API key management, role-based access control, and audit logging.
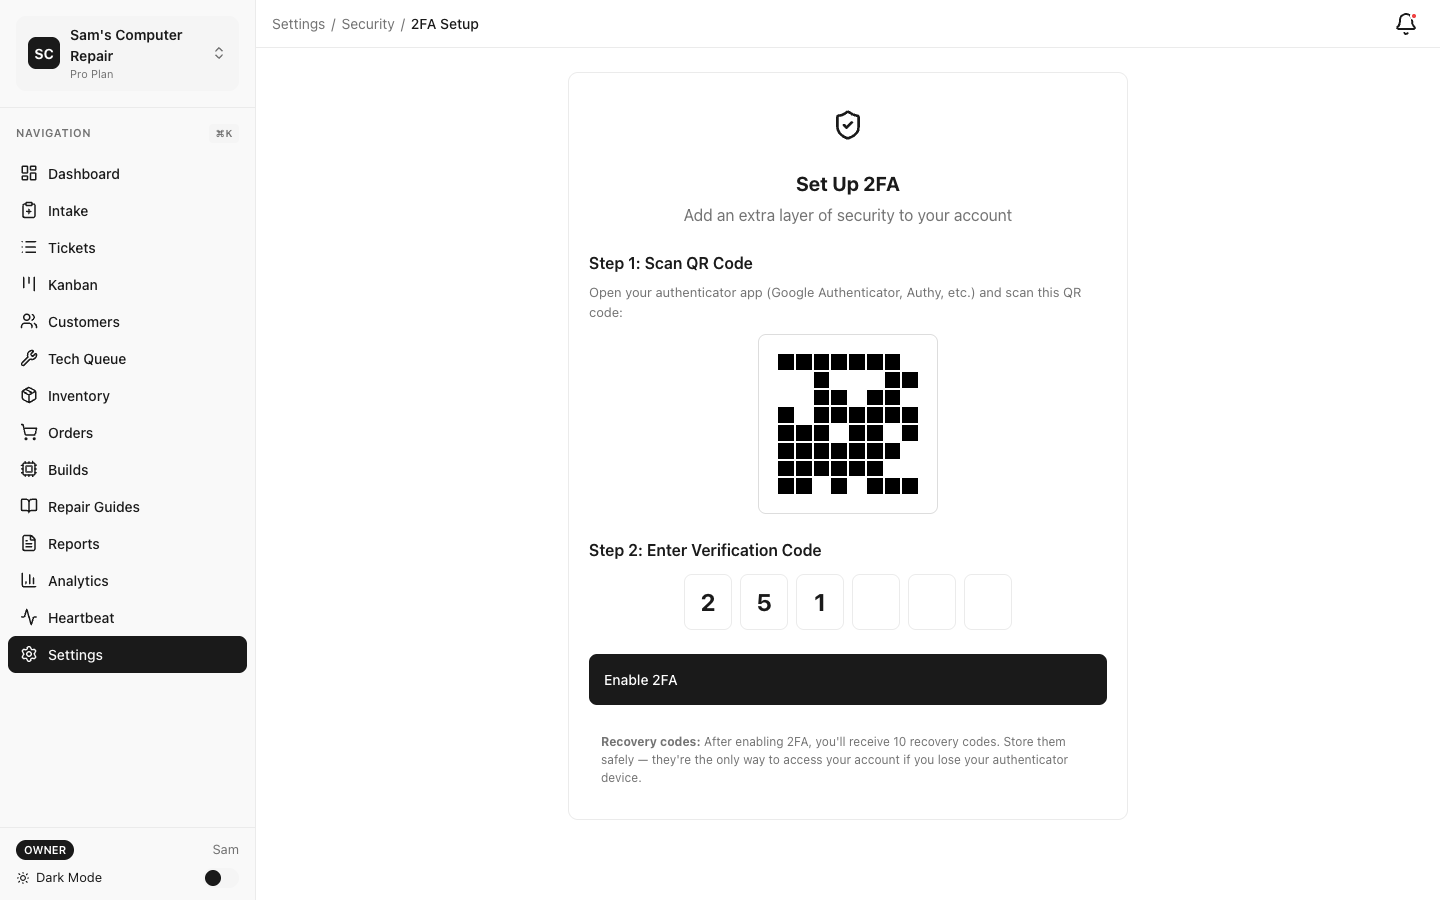
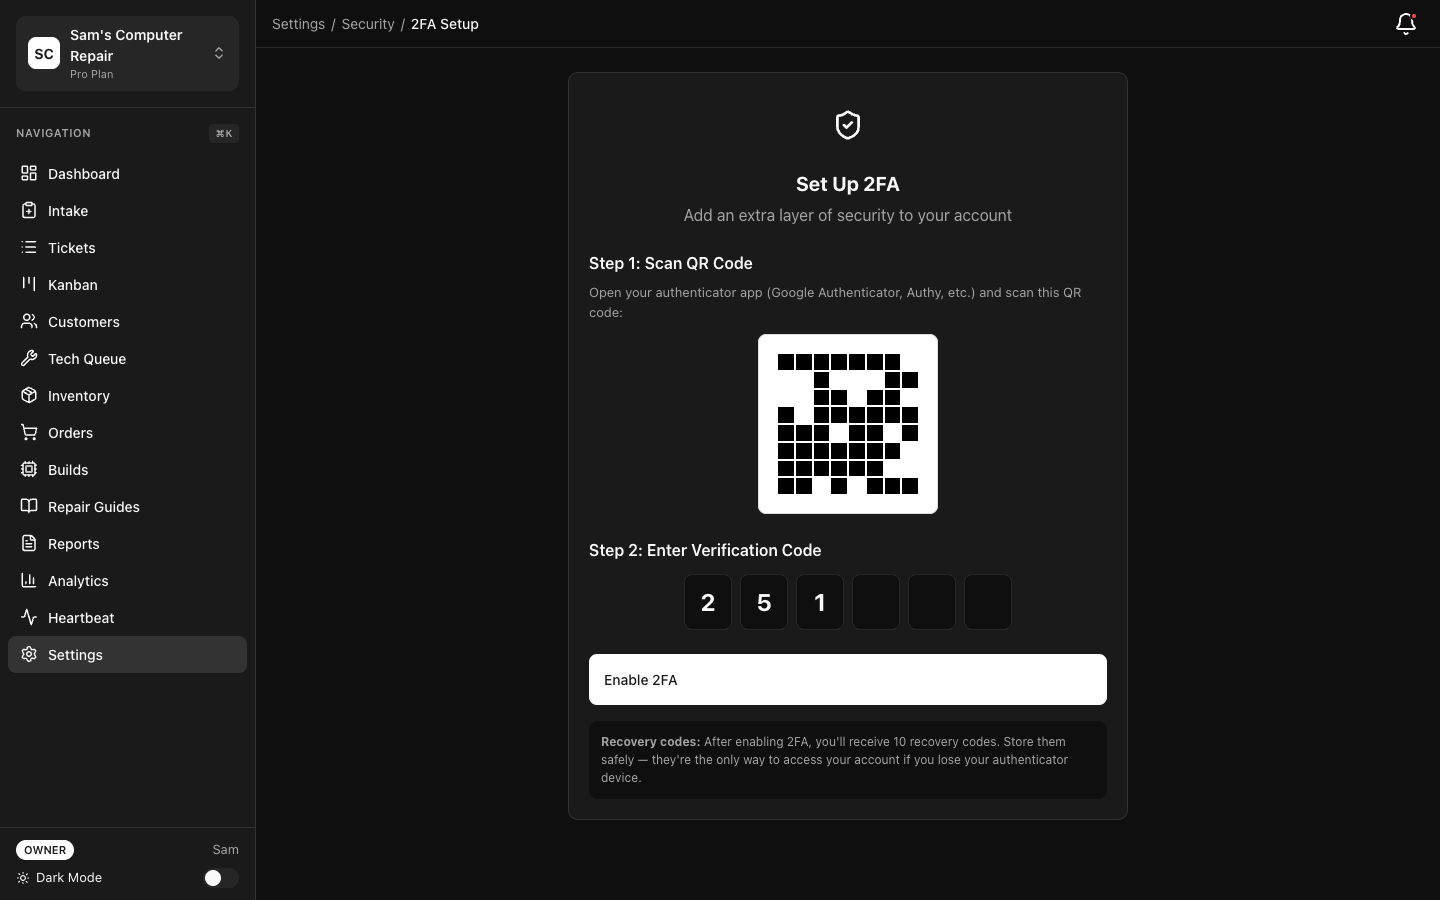
Two-Factor Authentication (2FA)
Section titled “Two-Factor Authentication (2FA)”Enabling 2FA for Your Account
Section titled “Enabling 2FA for Your Account”Protect your account from unauthorized access:
- Settings → Security → Two-Factor Authentication
- Click Enable 2FA
- Select preferred method:
- Authenticator App (recommended) — Use Google Authenticator, Authy, etc.
- SMS/Text Message — Code sent via SMS
- Backup Codes — One-time codes (save in secure location)
- Complete setup (scan QR code, confirm code)
- Save backup codes in a secure location
Requiring 2FA for All Team Members
Section titled “Requiring 2FA for All Team Members”For Enterprise tier:
- Settings → Security → 2FA Enforcement
- Select enforcement level:
- Optional — Users can enable 2FA (default)
- For Admins — Required for Owner/Manager roles only
- Required — All users must enable 2FA
- Save
Users are notified and have 7 days to enable 2FA before access is restricted.
Recovery Codes
Section titled “Recovery Codes”If you lose access to your authenticator app:
- Settings → Security → Backup Codes
- Each code can be used once
- After using a code, generate new backup codes
- Save in secure location (password manager, printed/locked)
API Key Management
Section titled “API Key Management”API keys allow external applications to access RepairOps data and workflows.
Creating an API Key
Section titled “Creating an API Key”- Navigate to Settings → API Keys
- Click Generate New Key
- Name your key (e.g., “Inventory Sync”)
- Select scope (permissions):
- Read — View data (tickets, customers, inventory)
- Write — Create/update data (create tickets, update inventory)
- Admin — Full access (user management, settings)
- Set expiration:
- 30, 90, 180 days, or never expire
- Recommended: 90 days (auto-rotate)
- Click Create
- Copy the key immediately (only shown once)
Using API Keys
Section titled “Using API Keys”In API requests, include your key in the Authorization header:
curl -H "Authorization: Bearer YOUR_API_KEY" \ https://api.repairops.io/v1/ticketsSee API Reference for full API documentation.
API Key Security
Section titled “API Key Security”- Never commit keys to version control (use environment variables)
- Don’t share keys in emails or chat
- Rotate keys every 90 days
- Delete keys you no longer use
- Use separate keys for different applications
Rate Limits
Section titled “Rate Limits”API calls are rate-limited per key:
| Scope | Limit |
|---|---|
| Read | 1,000 requests/hour |
| Write | 100 requests/hour |
| Admin | 10 requests/hour |
Requests exceeding limit return 429 Too Many Requests. Wait 1 hour and retry.
For higher limits, upgrade to Enterprise or contact support.
Role-Based Access Control (RBAC)
Section titled “Role-Based Access Control (RBAC)”RepairOps has 5 roles with different permissions:
- Full access to all features and settings
- Manage billing and subscriptions
- Add/remove team members
- Access company-wide reports
- Delete organization data
Manager
Section titled “Manager”- Manage all repair tickets and workflow
- View and assign work
- Access all reports and analytics
- Approve estimates
- Cannot change billing or user roles
Front Desk
Section titled “Front Desk”- Create tickets (check-in)
- View and approve customer estimates
- Process payments and pickups
- Cannot assign work or view detailed pricing
Technician
Section titled “Technician”- View assigned tickets
- Log repair work and parts usage
- Update ticket status
- Cannot see other technicians’ work or financial data
QC (Quality Control)
Section titled “QC (Quality Control)”- Access QC queue
- Review completed repairs
- Pass/fail decisions
- Cannot modify active repairs
Assigning Roles
Section titled “Assigning Roles”- Settings → Team → Members
- Click a team member
- Change role from dropdown
- Save
Only Owners can change roles.
Multi-Tenant Isolation (RLS)
Section titled “Multi-Tenant Isolation (RLS)”RepairOps uses Row-Level Security (RLS) to ensure data isolation:
How it works:
- Every ticket, customer, and file has an
org_id(organization ID) - Database enforces that users can only access data from their organization
- Even if a user’s API key is compromised, they cannot access other orgs’ data
You don’t configure this — it’s built-in and automatic.
Audit Logging
Section titled “Audit Logging”Track all security events and data changes:
Viewing Audit Logs
Section titled “Viewing Audit Logs”- Settings → Security → Audit Log
- View events:
- Login/logout
- User added/removed
- Data changed (tickets, customers, etc.)
- API access
- Settings changed
- Failed access attempts
- Filter by:
- Date range
- Event type
- User
- Resource (ticket, customer, etc.)
Audit Log Details
Section titled “Audit Log Details”Each log entry includes:
- Timestamp — When the action occurred
- User — Who performed the action
- Action — What was done (login, create, update, delete)
- Resource — What was affected (ticket #123, customer #456)
- IP Address — Where the request came from
- Result — Success/failure
Retention
Section titled “Retention”Audit logs are retained:
- Starter: 90 days
- Pro: 1 year
- Enterprise: 2 years
Older logs are deleted automatically.
Secrets Encryption
Section titled “Secrets Encryption”Sensitive data like API keys and payment details are encrypted:
Encryption Details
Section titled “Encryption Details”- Algorithm: AES-256-GCM
- Key Storage: Hardware Security Module (HSM)
- Access: Only necessary services can decrypt
What’s Encrypted
Section titled “What’s Encrypted”- API keys (vendor integrations)
- Payment card info (PCI compliance)
- SAML/OIDC credentials
- 3rd-party API credentials
- SSH keys (for self-hosted backups)
Accessing Encrypted Secrets
Section titled “Accessing Encrypted Secrets”When you need to reveal a secret:
- Settings → Integrations → Click the integration
- Click Reveal Secret
- You must confirm with 2FA
- Secret is decrypted and displayed (once only)
- Action is logged to audit trail
Why confirm with 2FA? This prevents attackers with access to your session from stealing secrets.
Password Security
Section titled “Password Security”RepairOps enforces strong password policies:
Starter & Pro
Section titled “Starter & Pro”- Minimum 12 characters
- Mix of uppercase, lowercase, numbers, symbols
- Cannot reuse last 5 passwords
Enterprise (Configurable)
Section titled “Enterprise (Configurable)”- Minimum length (default: 12)
- Complexity requirements (enable/disable)
- Expiration (e.g., change every 90 days)
- Password history (number of previous passwords to check)
Set policy in Settings → Security → Password Policy (Enterprise only).
Session Management
Section titled “Session Management”Session Timeout
Section titled “Session Timeout”Configure how long users can remain logged in idle:
- Settings → Security → Session Management
- Set idle timeout (default: 30 minutes)
- After inactivity, users are logged out
Concurrent Session Limit
Section titled “Concurrent Session Limit”Limit how many active sessions one user can have:
- Settings → Security → Session Limits
- Default: 5 concurrent sessions per user
- If exceeded, oldest session is logged out
This prevents session hijacking or shared accounts.
Remember Device
Section titled “Remember Device”Users can check “Remember this device” during login:
- Device is trusted for 30 days
- User doesn’t need 2FA on subsequent logins from that device
- Can be cleared manually in Settings → Trusted Devices
Network Security
Section titled “Network Security”IP Whitelisting (Enterprise)
Section titled “IP Whitelisting (Enterprise)”Restrict RepairOps access to specific IP addresses:
- Settings → Security → IP Whitelist
- Add IP addresses or ranges (CIDR notation)
- Only requests from whitelisted IPs are accepted
- All other requests are blocked with 403 Forbidden
Example:
192.168.1.0/24 (all IPs in your office)203.0.113.42 (specific vendor IP)VPN / Private Networks
Section titled “VPN / Private Networks”For Enterprise, RepairOps can be deployed on a private network:
- Not accessible from the internet
- Access only through your VPN
- Contact support for setup
Data Privacy
Section titled “Data Privacy”GDPR Compliance
Section titled “GDPR Compliance”RepairOps is GDPR-compliant:
- Data processing agreement (DPA) available
- Right to be forgotten (data export/deletion)
- Lawful basis (contract, consent, legitimate interest)
- Data residency options (EU, US, or your choice)
Request DPA at legal@repairops.io.
CCPA Compliance
Section titled “CCPA Compliance”California residents’ rights are supported:
- Right to know (export all data)
- Right to delete (removal of all records)
- Right to opt-out (no sale of personal info)
Process requests in Settings → Compliance → Data Requests.
HIPAA (Health Information)
Section titled “HIPAA (Health Information)”If storing patient health records:
- Business Associate Agreement (BAA) required
- Available for Enterprise tier only
- Contact support for BAA
Security Best Practices
Section titled “Security Best Practices”Checklist:
- Enable 2FA for all admin accounts
- Rotate API keys every 90 days
- Review audit logs monthly
- Remove unused user accounts
- Set appropriate role/permission levels
- Use strong, unique passwords
- Keep RepairOps updated
- Test disaster recovery (backups) quarterly
- Review data access patterns
For Admins:
- Do not share admin passwords
- Do not use admin account for daily work (use regular user account)
- Monitor failed login attempts in audit log
- Disable 2FA fallback methods (SMS) if possible; use authenticator app only
For Users:
- Change password every 90 days
- Never reuse passwords across sites
- Use a password manager
- Report suspicious activity immediately
- Lock computer when stepping away
Incident Response
Section titled “Incident Response”If You Suspect a Security Issue
Section titled “If You Suspect a Security Issue”- Immediately log out of RepairOps from all devices
- Change your password
- Enable 2FA if not already enabled
- Contact support: security@repairops.io
- We’ll investigate and advise next steps
If You Notice Unauthorized Access
Section titled “If You Notice Unauthorized Access”- Change admin password immediately
- Review audit logs for suspicious activity
- Disable any suspicious API keys
- Force logout all users: Settings → Security → Logout All Sessions
- Contact support for incident investigation
Compliance Certifications
Section titled “Compliance Certifications”RepairOps maintains the following:
- SOC 2 Type II — Security, availability, integrity audits
- ISO 27001 — Information security management
- PCI-DSS 3.2 — Payment card security
Audit reports available under NDA upon request.
Related Documentation
Section titled “Related Documentation”- Billing — Payment security
- Backups — Data backup encryption
- SSO — Authentication integration
- API Reference — API key usage